
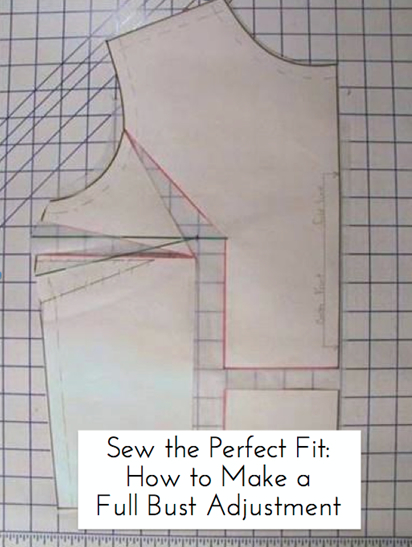
When it comes to using commercial patterns, it is important to remember they are drafted based on a bust that is a B-cup size. Since these companies must market their patterns to the majority of consumers, and the B-cup is the most common size, this makes good sense. But, certainly not all women have a B-sized bustline, which means the commercial pattern must be adjusted before any fabric is cut. Learning how to make this adjustment can make all the difference in constructing garments that not only mimic ready-to-wear, but in fact surpass boutique pieces. Why? Because your handmade garment will fit you perfectly.
Let’s go step-by-step through the process of a full bust adjustment!
Full bust adjustments can be done in a variety of ways. Most depend on the position or type of on the bodice pattern or if no darts exist at all. Since side bust darts are the most typical way garments are shaped to conform to the contours of the breasts the method taught here is based on this and is the easiest adjustment to make. Learning how to modify these darts is an important technique every garment sewer should know.
Not only for general fitting purposes, but since many original designs are based on basic slopers which contain the side bust dart, adjusting the fit of this dart must be done first before any other design changes are made.

Full bust measurement + high bust measurement
The process of adjusting for a fuller bust begins by measuring your bustline in two ways. First measure the fullest part of your bust. This is the typical measurement you use to determine pattern sizing. Now measure your high bust. This is the circumference measurement just under your armpits and just above your bustline. Note the difference of these two measurements as it will determine your new pattern cup size and the amount that needs to be added to the pattern:
Around 2″: B cup
Around 3″: C cup
Around 4″: D cup
Around 5″: DD cup
Next, gather the following supplies:
The bodice front pattern with a side bust dart
A sharp pencil for marking the pattern
A ruler
Clear tape
Scissors for paper cutting
Here are the steps for the FBA:
1. Select the pattern size based on the high bust measurement and use the bodice piece based on that size. Using this measurement to dictate size instead of the full bust measurement will ensure the shoulders and waist fit better.
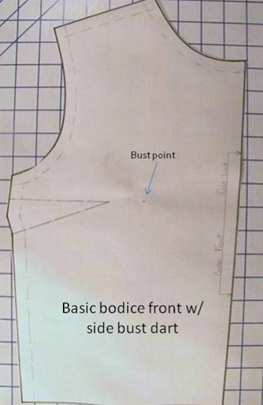
2. Hold up the pattern to your body lining up the center front and shoulder seam. Make sure it is positioned as accurately as possible to your body. Now mark a dot to indicate your bust point.
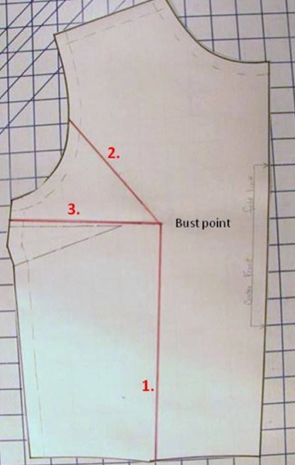
3. Draw three lines on the pattern:
From the bust point down to the waist, or hem, that is parallel to the center front grainline.
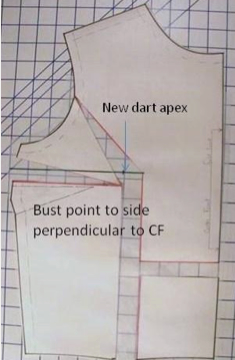
From the bust point to the side seam perpendicular to the center front grainline.
From the bust point to the center of the armhole curve.
4. Using the marked lines as your guide, cut the vertical line starting from the waist, or hem, up to the bust point, pivot and continue cutting to the armhole stopping just short enough to make a small hinge. Next, starting at the side seam cut to the bust point, again stopping short to leave a hinge at the bust point. Lastly, because when the new darts are formed the waist or hemline will be skewed, cut a horizontal line from the center front to the vertical line.
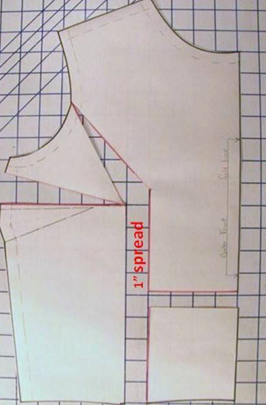
5. Using the following chart as your guide separate the vertical lines by the amounts detailed below:
For a C cup, separate the lines by ½”
For a D cup, by ¾”
For a DD cup, by 1″
For a E cup, 1 ¼”
Etcetera
6. As you separate the vertical lines new dart formations are created at the side and armhole. Place paper under these openings and tape in place. Also tape the bottom portion of the center front piece to align with the new waist or hemline.
7. Next, draw in the new side bust dart, or the FBA. Mark a line from the bust point (the one that never moved) to the side seam so it is perpendicular to the center front grainline. Measure 1 to 1 /2” (less for small adjustments, more for larger adjustments) from the bust point towards the side seam to mark the new dart’s apex. Now measure the distance at the widest point of the opening that was created where the side cut was made and use that to determine the width of the new dart. Using that measurement draw in the bottom dart leg.
8. Lastly, true up the side seam. Fold the line of the bottom dart leg up to the top leg and crease in place. While holding the dart in place and using a thumbtack or pin, poke a line that will serve as the new side seam cutting line. The pattern is now ready to use.